![Sportal365 logo-4.png]](https://knowledge-base.sportal365.com/hs-fs/hubfs/Sportal365%20logo-4.png?height=40&name=Sportal365%20logo-4.png)
The F1 Monitor widget shows one Formula 1 race weekend inside your article: session tabs, a track map with replay, timing and standings. It is the only widget under the Motorsports icon.
The fastest way to add it: select the red helmet icon in the quick-add row below the article body. Its name, Motorsports, appears when you hover it.
Preconditions
- Your project must have the Motorsports feature enabled. Widget categories are switched on per project, so if Motorsports does not appear in the block picker, ask your administrator to enable it.
- You need permission to create or edit articles.
- The race weekend you want must be available in the Event list. Search by the Grand Prix name.
Adding the F1 Monitor Widget to a post
To set up the widget:
- Open an article for editing, or create a new one.
- Below the blocks in the article body, find the quick-add row. The last sport icon, the red helmet, is Motorsports. Hover it to see its name, then select it.

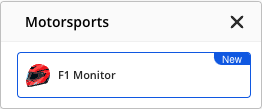
- In the Motorsports window, choose F1 Monitor. It is the only widget in the list and carries a New badge.
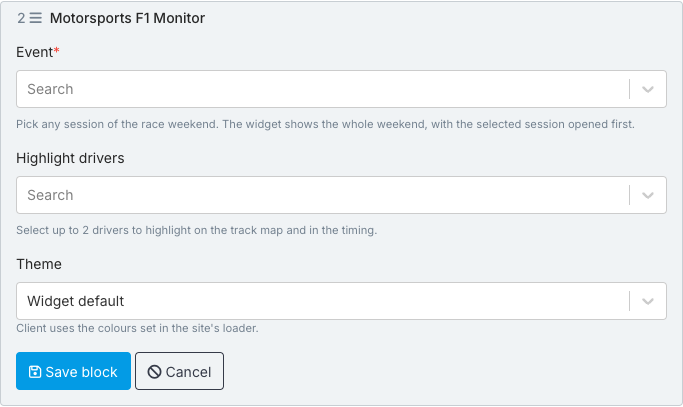
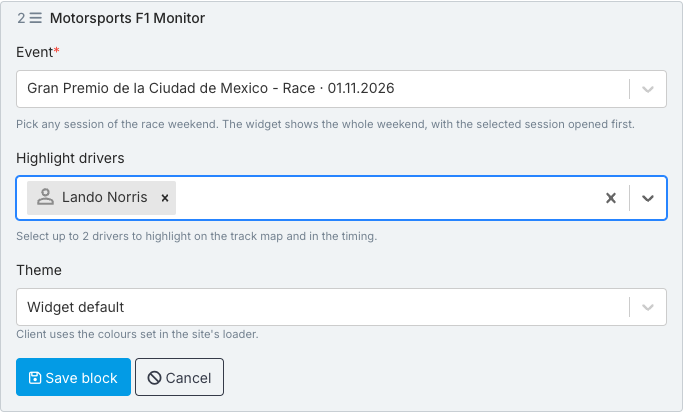
- The block opens with three fields: Event, Highlight drivers and Theme.
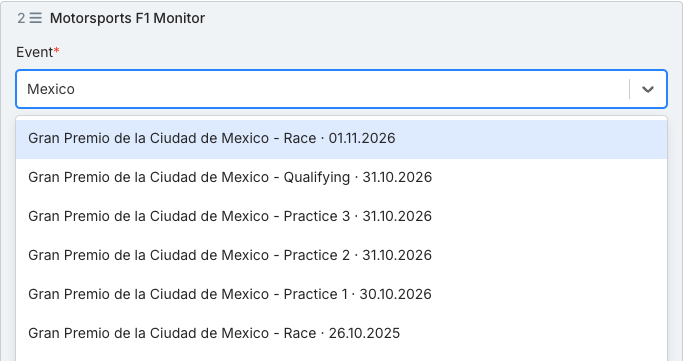
- Select Event and type the name of the Grand Prix. The list is empty until you type, and results take a few seconds to appear.
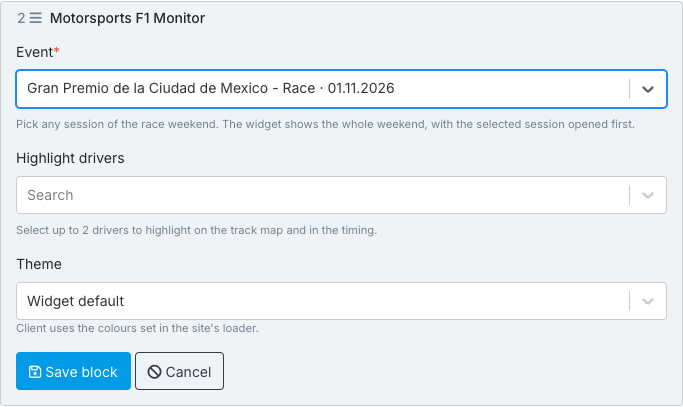
- Choose any session of the weekend. The widget shows the whole weekend, and the session you pick is opened first.
- Optional: select Highlight drivers, type a driver’s name and choose the driver from the list. Repeat to add a second driver: the CMS says you can select up to 2.
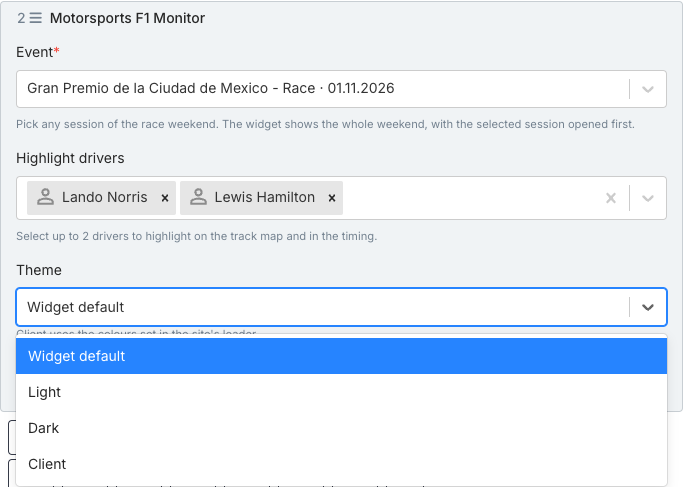
- Optional: open Theme and pick Widget default, Light, Dark or Client. It starts on Widget default.
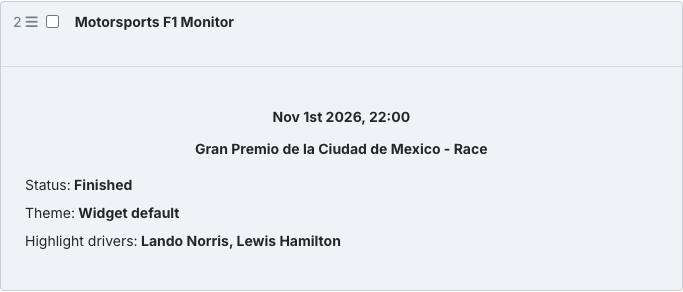
- When done, select Save block. The block card lists the session date and time, the Grand Prix and session name, its status, the theme and, if you set any, the highlighted drivers.
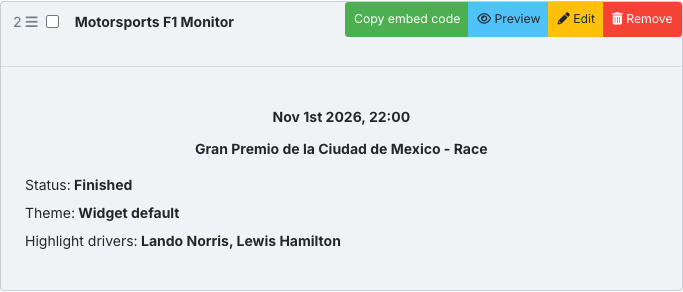
- Hover the saved block. Of the controls that appear (Copy embed code, Preview, Edit and Remove), select Preview to see the real widget.
F1 Monitor Widget options
- Event (required) — Pick any session of the race weekend. The widget shows the whole weekend, with the selected session opened first. Choosing Qualifying instead of Race opens the Qualifying tab first. Type to search; each entry reads Grand Prix name, session and date.
- Highlight drivers — Select up to 2 drivers to highlight on the track map and in the timing. The Driver panel opens on the last driver you chose. Leave it empty and the preview opens on the race winner.
- Theme — The colour theme. The choices are Widget default, Light, Dark and Client. Client uses the colours set in the site’s loader. In the CMS preview only Dark looks different; Light and Client look like Widget default. Default: Widget default.
What the F1 Monitor Widget shows
In the preview the widget is made of these parts, from top to bottom:
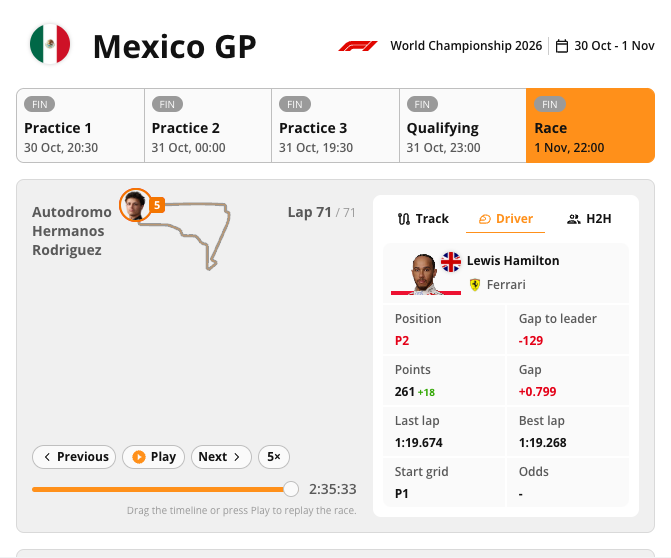
- Header — the Grand Prix: the country flag, the Grand Prix name, the F1 logo, the championship and season, and the date range of the weekend
- Session tabs — the weekend: one tab per session, such as Practice 1, Practice 2, Practice 3, Qualifying and Race, each with its date and time and a status badge such as FIN. The session you chose is highlighted
- Track map — the circuit: the circuit outline with a driver marker, the current lap out of the total, and replay controls: Previous, Play, Next and a speed button. A timeline slider sits below, with the hint to drag it or press Play to replay the race
- Track / Driver / H2H — the side panel: three tabs next to the map (H2H stands for head to head). The Driver tab shows the driver’s photo, flag, name and team, then Position, Gap to leader, Points, Gap, Last lap, Best lap, Start grid and Odds
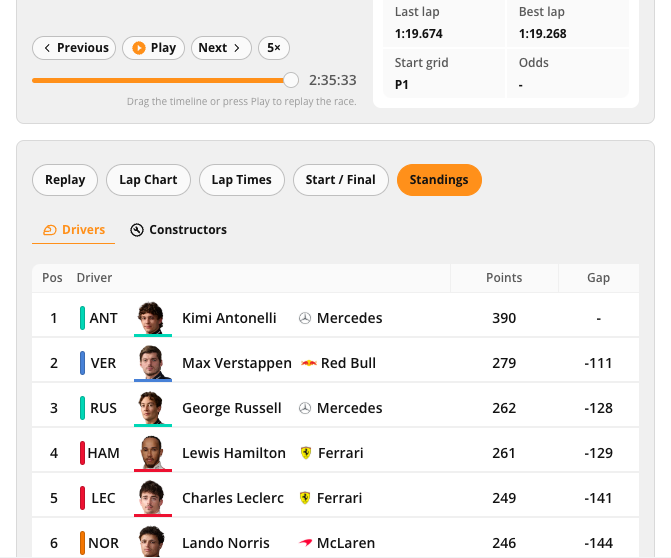
- Replay, Lap Chart, Lap Times, Start / Final, Standings — the lower tabs: more views of the session. The Replay tab is open first and lists Pos, Driver, Team, Gap, Last lap, Best lap, Laps and Pits for every driver, with a Show all button. The Standings tab shows the championship standings, with Drivers and Constructors views and the columns Pos, Driver, Points and Gap
Preview of the F1 Monitor Widget
The preview draws within a few seconds. In the preview window, scroll inside the block to reach the track map, the side panel and the lower tabs.
Scrolling down inside the block shows the replay controls and the lower tabs. Here the Standings tab is selected.
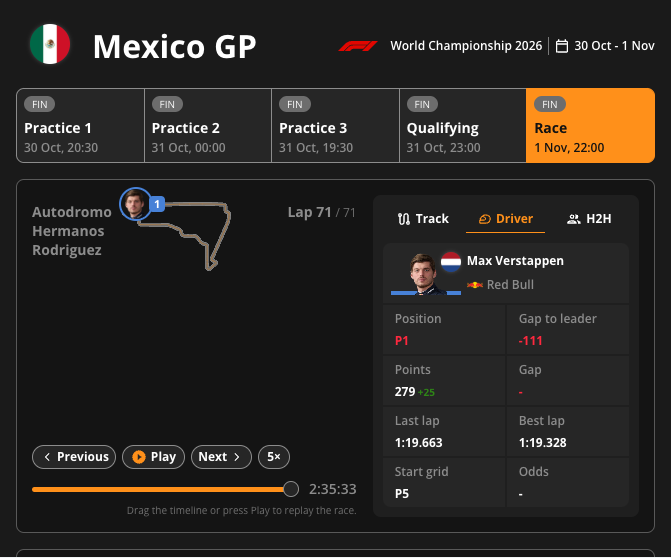
With Theme set to Dark, the whole widget has a dark background and light text.
Good to know
Only the preview shows the real widget. The collapsed block and the options panel show a CMS summary card instead — always check preview before publishing.
- The Event field picks a session, but the widget always shows the whole weekend. The chosen session only decides which tab opens first.
- With two highlighted drivers, the Driver panel opens on the last one you chose. With none, it opens on the race winner.
- The block card shows the highlighted drivers only when you set some.
- Only Formula 1 is supported for now.
- For a finished race, every session shows a finished status and the movement on the map comes from the replay controls: Previous, Play, Next and the speed button.
- The preview area is narrower than a published page, so the widget uses its compact layout there and may hide columns that the published version shows.
- The widget always renders whichever version of the sports widgets library your project is on. There is no version to set.
Troubleshooting
- The Event list is empty. The list stays empty until you type, and the results take a few seconds to arrive. Type the name of the Grand Prix, for example the host country, and wait a few seconds.
- Highlight drivers shows “No options”. The field has nothing to list until you type, and a short part of a name may find nothing. Type the driver’s name, wait a few seconds, then choose the driver from the list.
- Light or Client looks the same as Widget default. In the CMS preview, these themes look like Widget default, with a light background. Client takes its colours from the site’s loader. Check the result on your site. Choose Dark if you want a visible change in the preview.
- The widget looks like a plain summary card. The collapsed and edit views show a CMS summary, not the widget itself. Hover the saved block and select Preview to see the real widget.