
Add and remove watermarks to the new images you upload or edit already existing.
This new functionality makes adding a watermark to your images easier and strengthens your brand presence.

Adding a watermark to images
Adding a watermark to an image happens only from Galleries. To do so:
-
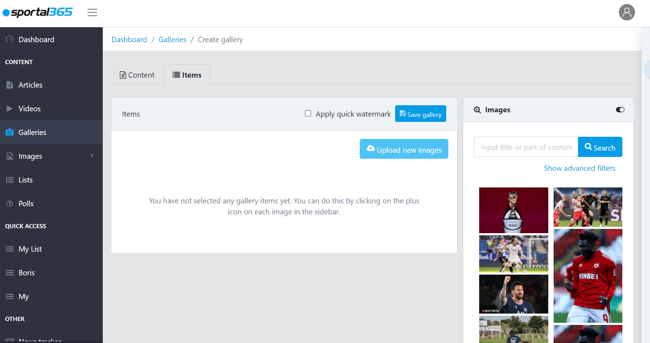
Go to Galleries → New Gallery.
-
Once the Create Gallery window opens select Items.
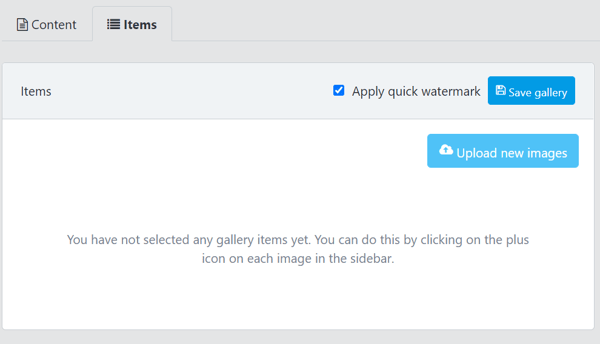
3. Then, before selecting Upload new images, select the Apply quick watermark checkbox.
Note that you can also edit an existing gallery and add/remove image watermarks.
Removing a watermark
Removing a watermark from an image happens from Galleries and All images.
To remove a watermark from Galleries:
-
Open a gallery and go to the Items tab.
-
Select the images from the list that you want to edit.
-
Go to the Edit items drop-down box and select Remove watermark.
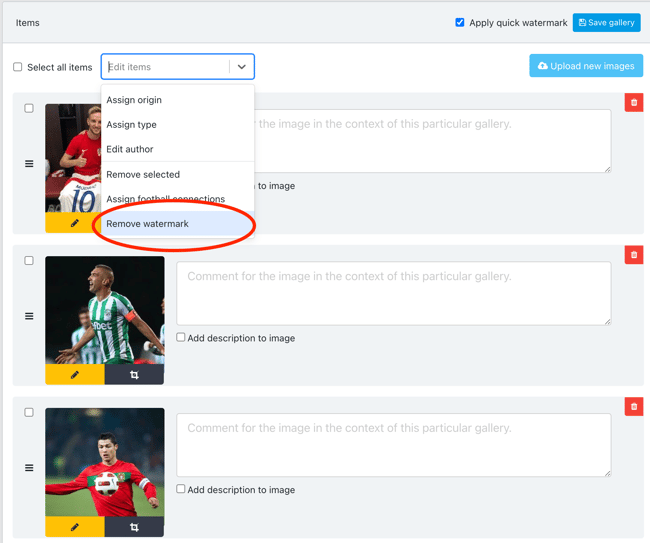
Note that you can remove the watermark from several images at the same time by Selecting all items and then Removing the watermark from the Edit items menu.
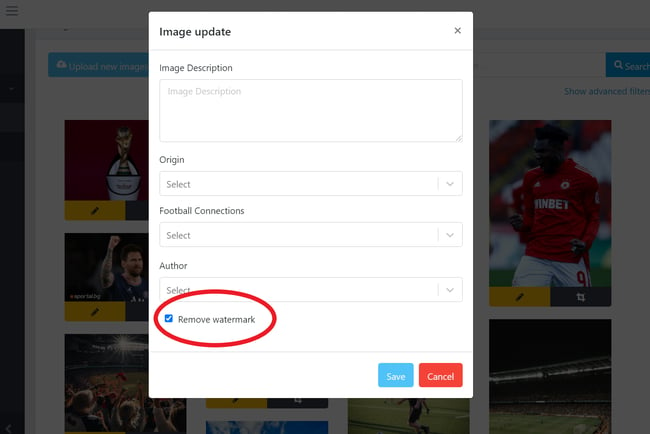
To remove a watermark from All images:
-
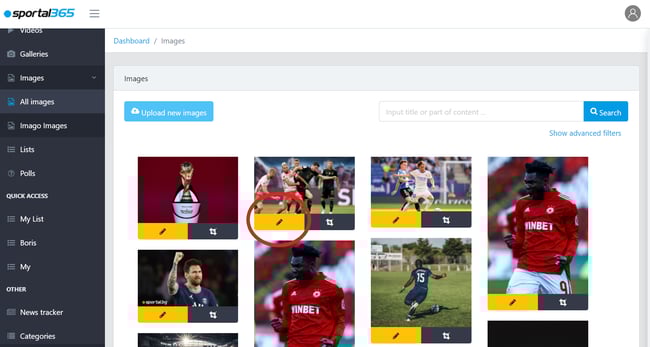
Go to All images.
-
Select an image with a watermark and select the pencil icon to edit it.
3. Once the Image update window opens, select Remove watermark at the bottom.
Note that the images in the All images grid are with their real ratio. This makes it easier to select an image with the right dimensions (landscape, portrait, etc.) when you upload it to your content.